I made Rice Krispie Treats Halloween Brains that look gloriously gross, weirdly impressive, and will make every kid at the party squeal in the best way.
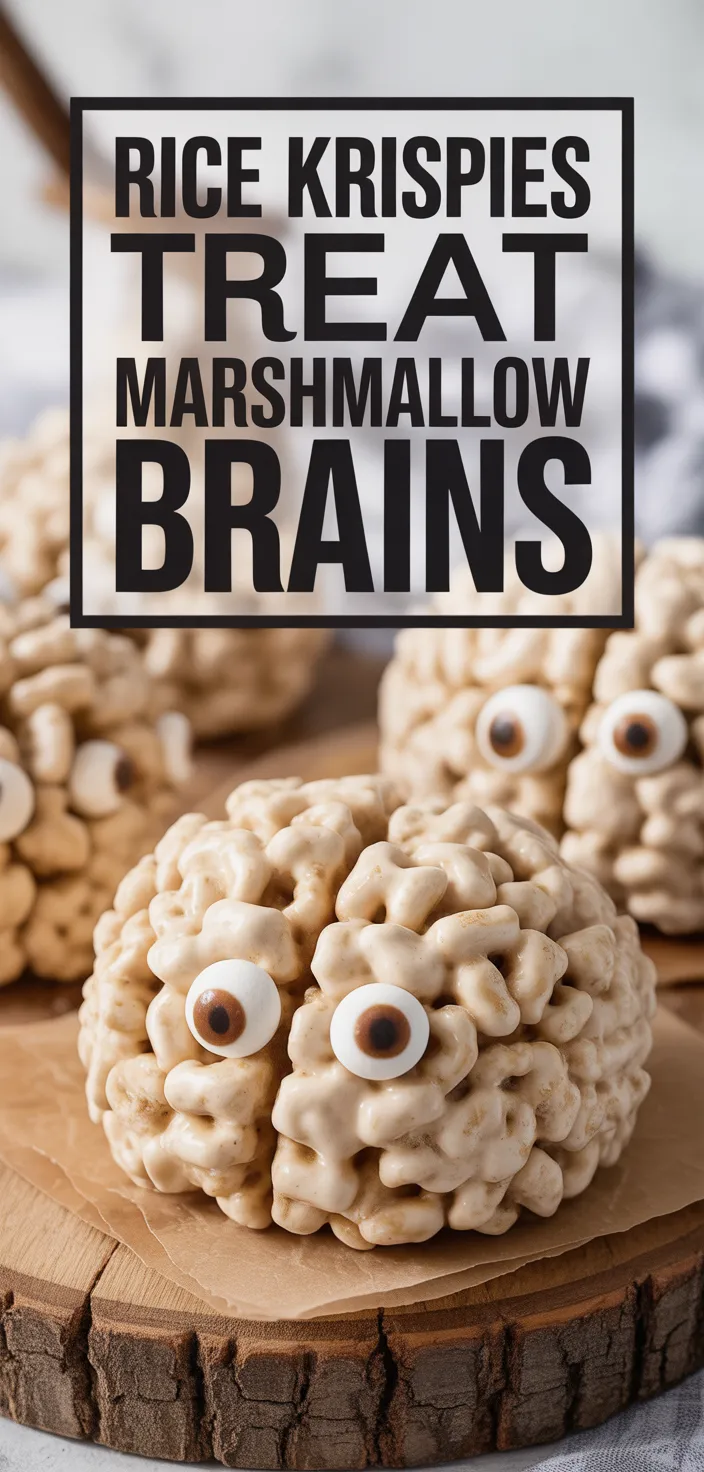
I’m obsessed with these Rice Krispie Treats Halloween Brains. I love the sticky mini marshmallows pull and the slightly crunchy Rice Krispies combo, and the whole thing looks gloriously gross on my Halloween Food Ideas Rice Krispies lineup.
I get weirdly proud when the pink and red gel food coloring makes the folds look realistic. Kids lose their minds.
But adults do too, sneaking bites between costumes. Messy, shiny, a little too sweet and worth it.
Makes a buffet feel like a haunted lab. I can’t stop reaching for another sloppy, brain-shaped bite.
My hands end up sticky every time.
Ingredients
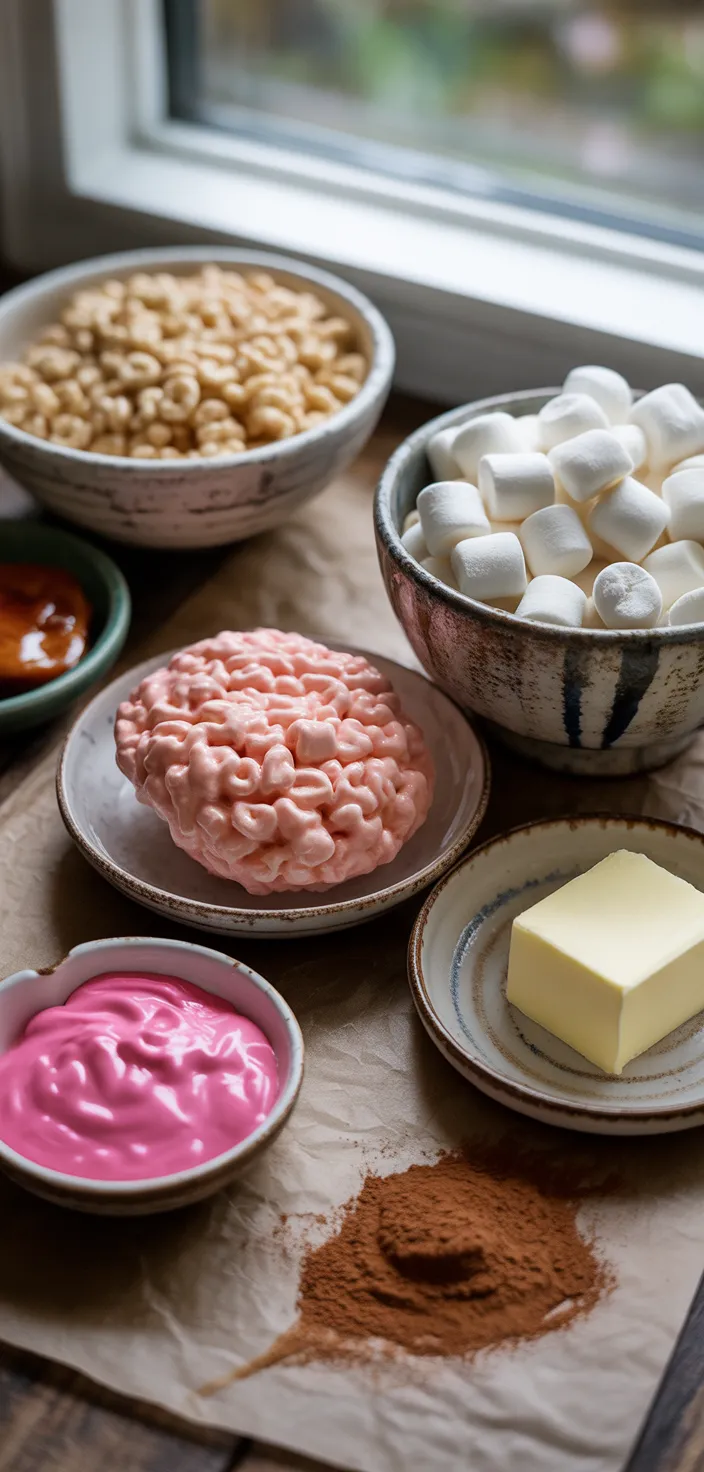
- Basically, Rice Krispies cereal gives crunchy, airy structure you can squish into brains.
- Plus, mini marshmallows bring gooey, sticky sweetness and that childhood nostalgia.
- Unsalted butter adds richness and helps everything melt into one chewy mass.
- Basically, vanilla extract sneaks in cozy flavor, subtle and kind of grown-up.
- Pink and red gel coloring create that brainy, creepy pink hue.
- Light corn syrup gives glossy, fake-blood shine and keeps surfaces slippery.
- Red decorating gel adds squishy blood drips and dramatic, messy details.
- Nonstick spray or buttered parchment makes molding easy and keeps sticking away.
- Optional cocoa or chocolate chips lend slight shading and depth to nooks.
Ingredient Quantities
- 6 cups Rice Krispies cereal
- 10 ounces (about 4 cups) mini marshmallows or one standard bag
- 3 tablespoons unsalted butter
- 1 teaspoon vanilla extract (optional but nice)
- Pink and red gel food coloring for the brain color
- 2 to 3 tablespoons light corn syrup for glossy “blood” shine
- Red decorating gel or piping gel for blood details
- Nonstick cooking spray or buttered parchment to shape the brains
- Optional small amount of cocoa powder or chocolate chips for slight shading
How to Make this
1. Spray a medium bowl and your hands with nonstick cooking spray or lay out buttered parchment, then measure 6 cups Rice Krispies cereal and set aside.
2. In a large saucepan melt 3 tablespoons unsalted butter over low heat, then add about 10 ounces mini marshmallows and stir constantly until totally melted and smooth; you can microwave 1 minute at a time, stirring in between, if you want faster results.
3. Stir in 1 teaspoon vanilla extract if using, then remove from heat and quickly add a few drops of pink gel food coloring and gently fold until you get a light pink base. Add a tiny bit of red gel coloring to deepen spots if you want more realistic brain mottling, but go slow, you can always add more.
4. Pour the melted marshmallow mixture over the Rice Krispies and stir with a silicone spatula until every piece is coated. Work fast while it is still warm and pliable.
5. Lightly butter your hands or spray them, scoop portions and press into a small rounded brain shape in your palm; alternatively press into a small silicone brain mold. Press firmly enough so they hold together but not so hard they become rock hard later.
6. While shaping, keep a small bowl of cold water nearby to wet your fingers when the sticky mix gets tacky. Use parchment squares to set shaped brains on to cool.
7. For glossy shine and fake blood: brush 2 to 3 tablespoons light corn syrup over each brain, spread thin with a pastry brush. Let the corn syrup set a minute until tacky.
8. Use red decorating gel or piping gel to draw squiggly brain “veins” and drips of blood, adding darker red spots for depth. If you want subtle shading, dust a tiny bit of cocoa powder in crevices or melt a few chocolate chips and swipe lightly with a toothpick for shadow.
9. Let brains cool and set completely at room temperature, about 30 to 60 minutes. Store in an airtight container at room temp for up to 2 days, or slightly longer if you keep them from humidity.
Equipment Needed
1. Medium mixing bowl (sprayed or lined with buttered parchment)
2. Large saucepan for melting butter and marshmallows
3. Silicone spatula for stirring and folding
4. Measuring cups and measuring spoons (3 Tbsp butter, 6 cups cereal, 1 tsp vanilla)
5. Pastry brush for corn syrup shine
6. Small silicone brain mold or just your hands (sprayed or buttered)
7. Small bowl of cold water to wet sticky fingers
8. Parchment squares or a tray to set shaped brains on
9. Toothpick or small squeeze bottle for red decorating gel detail
FAQ
Rice Krispies Treat Marshmallow Brains Recipe Substitutions and Variations
- Rice Krispies: swap for any puffed rice cereal or a gluten free puffed rice if needed. It’ll be a bit lighter or slightly crunchier, but still holds the shape.
- Mini marshmallows: use a bag of regular large marshmallows cut into pieces or 1 cup marshmallow creme plus a few chopped marshmallows. Works fine, just stir a little longer to melt evenly.
- Unsalted butter: replace with coconut oil (refined for neutral flavor) or vegan butter. Coconut oil melts the same, but your treats might be slightly less rich.
- Light corn syrup: substitute with honey, golden syrup, or agave. Honey is stickier and browner so color and shine change a bit, but it gives good glossy “blood” when mixed with gel.
Pro Tips
1. Work fast but don’t panic: marshmallow cools quicker than you think, so have your bowl, spatula and molds ready. If it starts to stiffen, pop the pan back on very low heat or microwave 15 seconds to loosen it up, then stir quick.
2. Layer the color for realism: add tiny drops of pink first, swirl, then add a smidge of red where you want darker spots. You can always add more color but you cant take it out, so go slow. Use a toothpick to dab darker bits rather than plunging in the whole bottle.
3. Keep your hands and tools slightly wet: a bowl of cold water or lightly buttered parchment stops the mix from sticking. Wet your fingers when shaping, not soaking, otherwise the mix will get too slippery and the shape will collapse.
4. Make the shine and “blood” last minute: brush corn syrup on right before decorating, then add piping gel. If you do it too early the syrup attracts dust and gets tacky. Store in an airtight container with a paper towel on top to absorb any humidity, dont refrigerate or they’ll turn leathery.
Rice Krispies Treat Marshmallow Brains Recipe
I made Rice Krispie Treats Halloween Brains that look gloriously gross, weirdly impressive, and will make every kid at the party squeal in the best way.
12
servings
174
kcal
Equipment: 1. Medium mixing bowl (sprayed or lined with buttered parchment)
2. Large saucepan for melting butter and marshmallows
3. Silicone spatula for stirring and folding
4. Measuring cups and measuring spoons (3 Tbsp butter, 6 cups cereal, 1 tsp vanilla)
5. Pastry brush for corn syrup shine
6. Small silicone brain mold or just your hands (sprayed or buttered)
7. Small bowl of cold water to wet sticky fingers
8. Parchment squares or a tray to set shaped brains on
9. Toothpick or small squeeze bottle for red decorating gel detail
Ingredients
6 cups Rice Krispies cereal
10 ounces (about 4 cups) mini marshmallows or one standard bag
3 tablespoons unsalted butter
1 teaspoon vanilla extract (optional but nice)
Pink and red gel food coloring for the brain color
2 to 3 tablespoons light corn syrup for glossy "blood" shine
Red decorating gel or piping gel for blood details
Nonstick cooking spray or buttered parchment to shape the brains
Optional small amount of cocoa powder or chocolate chips for slight shading
Directions
- Spray a medium bowl and your hands with nonstick cooking spray or lay out buttered parchment, then measure 6 cups Rice Krispies cereal and set aside.
- In a large saucepan melt 3 tablespoons unsalted butter over low heat, then add about 10 ounces mini marshmallows and stir constantly until totally melted and smooth; you can microwave 1 minute at a time, stirring in between, if you want faster results.
- Stir in 1 teaspoon vanilla extract if using, then remove from heat and quickly add a few drops of pink gel food coloring and gently fold until you get a light pink base. Add a tiny bit of red gel coloring to deepen spots if you want more realistic brain mottling, but go slow, you can always add more.
- Pour the melted marshmallow mixture over the Rice Krispies and stir with a silicone spatula until every piece is coated. Work fast while it is still warm and pliable.
- Lightly butter your hands or spray them, scoop portions and press into a small rounded brain shape in your palm; alternatively press into a small silicone brain mold. Press firmly enough so they hold together but not so hard they become rock hard later.
- While shaping, keep a small bowl of cold water nearby to wet your fingers when the sticky mix gets tacky. Use parchment squares to set shaped brains on to cool.
- For glossy shine and fake blood: brush 2 to 3 tablespoons light corn syrup over each brain, spread thin with a pastry brush. Let the corn syrup set a minute until tacky.
- Use red decorating gel or piping gel to draw squiggly brain "veins" and drips of blood, adding darker red spots for depth. If you want subtle shading, dust a tiny bit of cocoa powder in crevices or melt a few chocolate chips and swipe lightly with a toothpick for shadow.
- Let brains cool and set completely at room temperature, about 30 to 60 minutes. Store in an airtight container at room temp for up to 2 days, or slightly longer if you keep them from humidity.
Notes
- Below you’ll find my best estimate of this recipe’s nutrition facts. Treat the numbers as a guide rather than a rule—great food should nourish both body and spirit. Figures are approximate, and the website owner assumes no liability for any inaccuracies in this recipe.
Nutrition Facts
- Serving Size: 48g
- Total number of serves: 12
- Calories: 174kcal
- Fat: 3.6g
- Saturated Fat: 1.8g
- Trans Fat: 0.04g
- Polyunsaturated: 0.25g
- Monounsaturated: 0.43g
- Cholesterol: 7.6mg
- Sodium: 78mg
- Potassium: 17mg
- Carbohydrates: 37g
- Fiber: 0.5g
- Sugar: 28g
- Protein: 1.1g
- Vitamin A: 25IU
- Vitamin C: 0mg
- Calcium: 30mg
- Iron: 1.2mg