I designed a Two Sweet Birthday Party ice cream bar for a 2nd birthday, and my playful Ice Cream Sundae Station hides colorful DIY details and charming party decor you’ll want to explore.
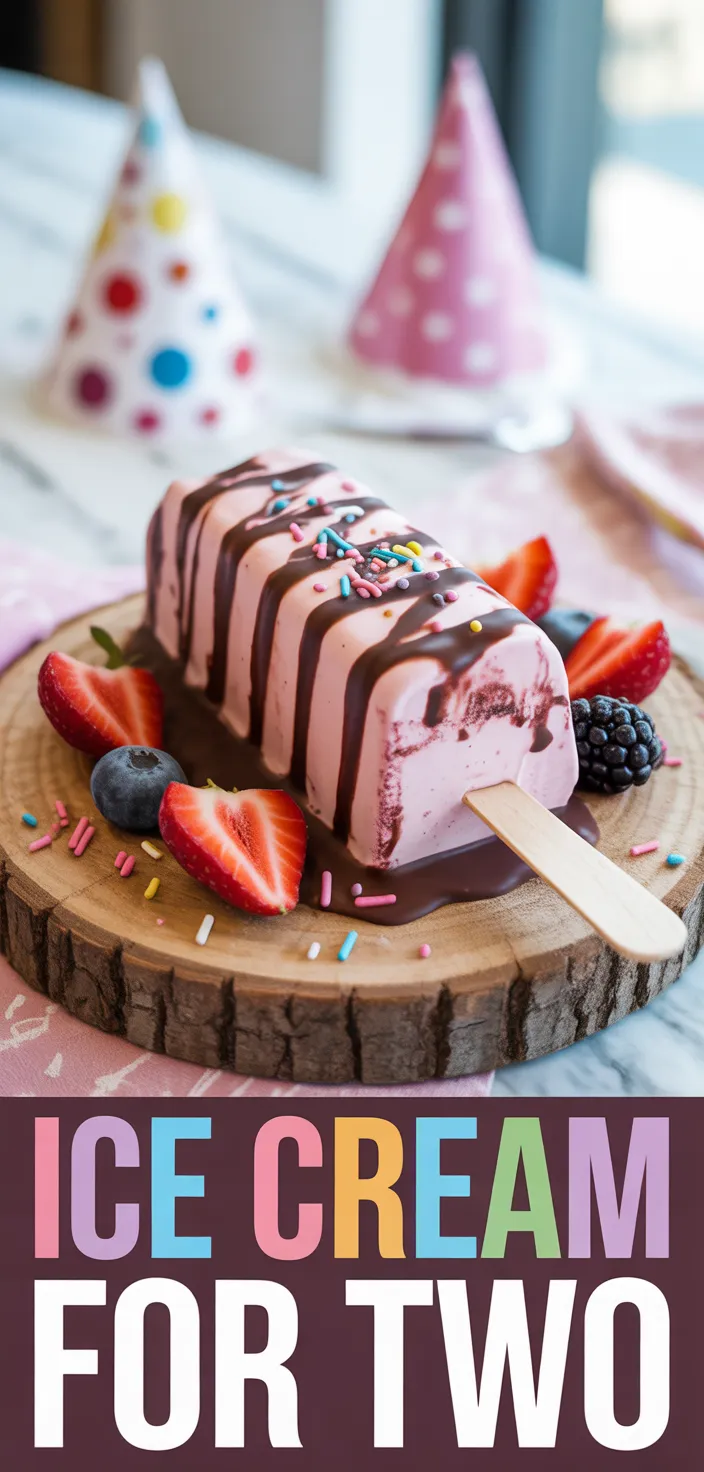
I’m still kind of obsessed with the tiny, over-the-top Ice Cream Bar For Two Sweet Birthday Party!! I started with plain ol’ vanilla ice cream and a mountain of rainbow sprinkles and somehow it turned into this ridiculous happy mess.
It’s short and sweet, exactly the kind of thing you want for an Ice Cream For Birthday Party where two kids feel like the whole world is theirs for a minute. I leaned into that Two Sweet Party 2nd Birthday Diy energy, added some goofy little details, and suddenly the decor was stealing the show.
You’ll wanna see how it all comes together.
Ingredients
- Vanilla ice cream: creamy carbs and fat, a bit of protein, very sweet nostalgic.
- Chocolate ice cream: cocoa adds antioxidants, still sugary and fatty, richer flavor keeps you happy.
- Strawberry ice cream: fruity taste, slight vitamin C from berries, sweet with tart notes.
- Hot fudge sauce: pure chocolate sugar and fat, very indulgent, not healthy.
- Caramel sauce: buttery sweet syrup, high sugar and calories, sticky delight.
- Rainbow sprinkles: mostly sugar and food dye, crunchy color, no real nutrients dont.
- Toasted nuts: good source of protein and healthy fats, adds crunch and depth.
- Whipped cream: airy dairy fat, light sweet topping, low nutrients but tasty its tempting.
- Maraschino cherries: bright sweet syrup soaked fruit, mostly sugar, adds pop dont.
- Gummy bears: chewy candy, pure carbs, very sweet, fun for kids sometimes.
Ingredient Quantities
- 1 pint vanilla ice cream (plain ol’ favorite)
- 1 pint chocolate ice cream
- 1 pint strawberry ice cream
- 4 mini sugar cones
- 2 small waffle bowls
- 1/2 cup hot fudge sauce
- 1/2 cup caramel sauce
- 1/2 cup strawberry syrup
- 1 cup rainbow sprinkles
- 1/2 cup mini chocolate chips
- 1/2 cup crushed Oreo cookies
- 1/2 cup mini M&M candies
- 1/3 cup chopped toasted peanuts or pecans
- 12 mini marshmallows
- 12 gummy bears
- 6 chocolate wafer sticks
- 1 can whipped cream (about 8 oz)
- 6 maraschino cherries
- 4 brownie bites or small cookie pieces
- 2 tbsp colored sanding sugar
How to Make this
1. Pull the three pints out of the freezer for about 5 to 10 minutes so they soften just enough to scoop easy, and warm the hot fudge, caramel and strawberry syrup in 10 second bursts in the microwave until pourable. While that’s happening toast the chopped nuts in a dry skillet for 1 to 2 minutes to wake up the flavor, and crush the Oreos into crumbs.
2. Put the 2 waffle bowls and 4 mini sugar cones on a tray or plate. Dip the rim of each waffle bowl and the top lip of each mini cone into a little warmed caramel or fudge, then press into the colored sanding sugar so they get a fun sparkly rim. Pop the waffle bowls in the freezer for 2 minutes if you want extra help slowing melt.
3. For two people: give each person one waffle bowl and two mini cones. Start filling each waffle bowl with one scoop of vanilla, one scoop of chocolate and one scoop of strawberry, stacked or side by side — whatever looks cute. Put a single scoop of any flavor into each mini cone.
4. Drizzle a little hot fudge, a little caramel and a little strawberry syrup over each bowl and each cone, alternating so every bite has some sauce. Use as much or as little as you like, but heat makes the drizzle prettier and faster to set.
5. Sprinkle on the rainbow sprinkles, mini chocolate chips, crushed Oreos and mini M&Ms over everything so each bowl and cone gets a colorful crunchy layer.
6. Scatter the toasted nuts, the 12 mini marshmallows and the 12 gummy bears across the two bowls and four cones — tuck some marshmallows next to scoops, drop a couple gummies on top so the kids go “wow”.
7. Break the 4 brownie bites or small cookie pieces into halves and nestle them into the bowls and cones for chewy bites. Stick the 6 chocolate wafer sticks into the bowls or cones as little edible straws or chocolate wands.
8. Top each ice cream creation with a generous squirt of whipped cream and finish with 3 maraschino cherries on each person’s spread so all 6 cherries get used.
9. Quick tips: serve immediately on chilled plates, keep extra sauces in small bowls for refills, and if you want toasted marshmallows use a kitchen torch for a second or broil super quick while watching. Don’t overthink it, have fun with the placement, and wipe up drips fast so the cones don’t get soggy.
Equipment Needed
1. Freezer or chilled tray to keep waffle bowls cold, helps slow the melt
2. Microwave plus a microwave safe bowl or heatproof measuring cup for warming sauces
3. Ice cream scoop (one regular) and a small spoon or mini scoop for the mini cones
4. Small dry skillet for toasting nuts, and a wooden spoon or spatula to stir
5. Baking sheet or large plate/tray to arrange bowls and cones while decorating
6. Several small bowls and teaspoons for sauces, sprinkles and toppings, makes serving easy
7. Cutting board and a small knife to chop nuts and break brownies into pieces
8. Kitchen torch or oven broiler (optional) if you want toasted marshmallows or charred toppings
FAQ
Ice Cream Bar For Two Sweet Birthday Party!! Recipe Substitutions and Variations
- Vanilla ice cream:
- Plain frozen yogurt, lighter and a little tangy
- Coconut milk vanilla ice cream, dairy free and similar texture
- Banana “nice cream” (blend frozen bananas), no added sugar and creamy
- Custard or French vanilla, richer and more eggy in flavor
- Mini sugar cones:
- Mini waffle cones, crisp with more waffle flavor
- Small waffle bowls, easier to fill and less messy, youll like the stability
- Broken cone pieces or crushed graham crackers, great for coating or crunch
- Sugar cookie rounds or cookie cups, for a flat, cookie-y base
- Hot fudge sauce:
- Chocolate syrup, thinner but quick and common
- Warm Nutella or chocolate-hazelnut spread, richer and nutty
- Dark chocolate ganache (melted chocolate + cream), decadent and glossy
- Mix caramel with cocoa powder, if you dont have straight-up chocolate sauce
- Rainbow sprinkles:
- Colored sanding sugar, sparkly and already in the ingredient list
- Mini M&M candies, chunkier chocolate pops of color
- Crushed freeze-dried fruit (strawberry or raspberry), bright color plus tartness
- Toasted coconut flakes dyed with food coloring, for a tropical look and texture
Pro Tips
– Seal the inside of each cone with a thin layer of melted chocolate so they dont get soggy fast. It makes a little waterproof barrier and adds extra crunch, and you can do that hours ahead and chill them so theyre ready.
– Use a metal scooper warmed in hot water and wiped dry between scoops for smooth, round scoops that slide out easy. If you want ultra tidy presentation, pre-scoop onto a parchment-lined tray and freeze the scoops for 10 minutes before plating.
– Put sauces in squeeze bottles or small ladles instead of spooning from the jars, that way you control the drizzle and stop over-pouring. Keep the bottles in a bowl of warm water so the sauces stay pourable without nuking them.
– Prep toppings into small bowls and line everything up assembly-line style, kids can even grab a station. Keep a chilled serving tray or plates and a damp cloth handy to wipe drips quick, it saves the cones from turning into messy mush.
Ice Cream Bar For Two Sweet Birthday Party!! Recipe
I designed a Two Sweet Birthday Party ice cream bar for a 2nd birthday, and my playful Ice Cream Sundae Station hides colorful DIY details and charming party decor you'll want to explore.
12
servings
459
kcal
Equipment: 1. Freezer or chilled tray to keep waffle bowls cold, helps slow the melt
2. Microwave plus a microwave safe bowl or heatproof measuring cup for warming sauces
3. Ice cream scoop (one regular) and a small spoon or mini scoop for the mini cones
4. Small dry skillet for toasting nuts, and a wooden spoon or spatula to stir
5. Baking sheet or large plate/tray to arrange bowls and cones while decorating
6. Several small bowls and teaspoons for sauces, sprinkles and toppings, makes serving easy
7. Cutting board and a small knife to chop nuts and break brownies into pieces
8. Kitchen torch or oven broiler (optional) if you want toasted marshmallows or charred toppings
Ingredients
1 pint vanilla ice cream (plain ol' favorite)
1 pint chocolate ice cream
1 pint strawberry ice cream
4 mini sugar cones
2 small waffle bowls
1/2 cup hot fudge sauce
1/2 cup caramel sauce
1/2 cup strawberry syrup
1 cup rainbow sprinkles
1/2 cup mini chocolate chips
1/2 cup crushed Oreo cookies
1/2 cup mini M&M candies
1/3 cup chopped toasted peanuts or pecans
12 mini marshmallows
12 gummy bears
6 chocolate wafer sticks
1 can whipped cream (about 8 oz)
6 maraschino cherries
4 brownie bites or small cookie pieces
2 tbsp colored sanding sugar
Directions
- Pull the three pints out of the freezer for about 5 to 10 minutes so they soften just enough to scoop easy, and warm the hot fudge, caramel and strawberry syrup in 10 second bursts in the microwave until pourable. While that’s happening toast the chopped nuts in a dry skillet for 1 to 2 minutes to wake up the flavor, and crush the Oreos into crumbs.
- Put the 2 waffle bowls and 4 mini sugar cones on a tray or plate. Dip the rim of each waffle bowl and the top lip of each mini cone into a little warmed caramel or fudge, then press into the colored sanding sugar so they get a fun sparkly rim. Pop the waffle bowls in the freezer for 2 minutes if you want extra help slowing melt.
- For two people: give each person one waffle bowl and two mini cones. Start filling each waffle bowl with one scoop of vanilla, one scoop of chocolate and one scoop of strawberry, stacked or side by side — whatever looks cute. Put a single scoop of any flavor into each mini cone.
- Drizzle a little hot fudge, a little caramel and a little strawberry syrup over each bowl and each cone, alternating so every bite has some sauce. Use as much or as little as you like, but heat makes the drizzle prettier and faster to set.
- Sprinkle on the rainbow sprinkles, mini chocolate chips, crushed Oreos and mini M&Ms over everything so each bowl and cone gets a colorful crunchy layer.
- Scatter the toasted nuts, the 12 mini marshmallows and the 12 gummy bears across the two bowls and four cones — tuck some marshmallows next to scoops, drop a couple gummies on top so the kids go "wow".
- Break the 4 brownie bites or small cookie pieces into halves and nestle them into the bowls and cones for chewy bites. Stick the 6 chocolate wafer sticks into the bowls or cones as little edible straws or chocolate wands.
- Top each ice cream creation with a generous squirt of whipped cream and finish with 3 maraschino cherries on each person's spread so all 6 cherries get used.
- Quick tips: serve immediately on chilled plates, keep extra sauces in small bowls for refills, and if you want toasted marshmallows use a kitchen torch for a second or broil super quick while watching. Don't overthink it, have fun with the placement, and wipe up drips fast so the cones don't get soggy.
Notes
- Below you’ll find my best estimate of this recipe’s nutrition facts. Treat the numbers as a guide rather than a rule—great food should nourish both body and spirit. Figures are approximate, and the website owner assumes no liability for any inaccuracies in this recipe.
Nutrition Facts
- Serving Size: 137g
- Total number of serves: 12
- Calories: 459kcal
- Fat: 24.7g
- Saturated Fat: 10g
- Trans Fat: 0.25g
- Polyunsaturated: 1.7g
- Monounsaturated: 4.2g
- Cholesterol: 35mg
- Sodium: 207mg
- Potassium: 92mg
- Carbohydrates: 78.7g
- Fiber: 1.7g
- Sugar: 58g
- Protein: 4.5g
- Vitamin A: 900IU
- Vitamin C: 1mg
- Calcium: 83mg
- Iron: 0.7mg